Self-Hosted
Deploy with Docker
Deploy your Fider using Docker
Prerequisites
Docker https://docs.docker.com/engine/install
As we don't distribute Linux or Windows specific binaries, Docker is a must to host Fider. It provides a consistent runtime environment and is widely supported by many cloud providers. You can run it standalone or in a container orchestration.
Docker Compose https://docs.docker.com/compose/install
This installation guide uses Docker Compose to simplify the setup of containers.
PostgreSQL 12+ Database
Although Fider works on PostgreSQL 9.6, we recommend using PostgreSQL 12+. This guide uses Postgres inside a container for simplicity, but it's possible to install it on the host virtual machine or a different machine.
E-mail Sender
You can choose between a SMTP Server or a Mailgun account.
Installing and Running
Step 1: Create a docker compose file
Create a /var/fider folder and copy content below into a file /var/fider/docker-compose.yml. Read the inline comments to know what each setting is used for and modify them appropriately.
version: '2'
services:
  db:
    restart: always
    image: postgres:12
    volumes:
      - /var/fider/pg_data:/var/lib/postgresql/data
    environment:
      POSTGRES_USER: fider
      POSTGRES_PASSWORD: s0m3g00dp4ssw0rd
  app:
    restart: always
    image: getfider/fider:stable
    ports:
      - "80:3000"
    environment:
      # Public Host Name
      BASE_URL: http://localhost

      # Connection string to the PostgreSQL database
      DATABASE_URL: postgres://fider:s0m3g00dp4ssw0rd@db:5432/fider?sslmode=disable

      # Generate a 512-bit secret here https://www.allkeysgenerator.com/Random/Security-Encryption-Key-Generator.aspx
      JWT_SECRET: VERY_STRONG_SECRET_SHOULD_BE_USED_HERE

      # From which account e-mails will be sent
      EMAIL_NOREPLY: noreply@yourdomain.com

      ###
      # EMAIL
      # Either EMAIL_MAILGUN_* or EMAIL_SMTP_* or EMAIL_AWSSES_* is required
      ###

      # EMAIL_MAILGUN_API: key-yourkeygoeshere
      # EMAIL_MAILGUN_DOMAIN: yourdomain.com
      # EMAIL_MAILGUN_REGION: US

      # EMAIL_SMTP_HOST: smtp.yourdomain.com
      # EMAIL_SMTP_PORT: 587
      # EMAIL_SMTP_USERNAME: user@yourdomain.com
      # EMAIL_SMTP_PASSWORD: s0m3p4ssw0rd
      # EMAIL_SMTP_ENABLE_STARTTLS: 'true'

      # EMAIL_AWSSES_REGION: us-east-1
      # EMAIL_AWSSES_ACCESS_KEY_ID: youraccesskeygoeshere
      # EMAIL_AWSSES_SECRET_ACCESS_KEY: yoursecretkeygoeshere
The Docker Compose file above defines two services: db and app. In case you're using an external Postgres database, remove the db service and replace DATABASE_URL environment variable with your connection string.
Step 2: Pull the images and run it
Open your favorite terminal, navigate to /var/fider and run
docker compose pull
docker compose up -d
Important! If you see messages like
Error: dial tcp <ip-address>:5432: connect: connection refused. Don't panic, that's expected when using PostgreSQL in Docker. That happens when the application starts before the database is still ready.
You can find the logs by using docker-compose logs app. The message http server started on :3000 means everything is ok and you're ready to go.
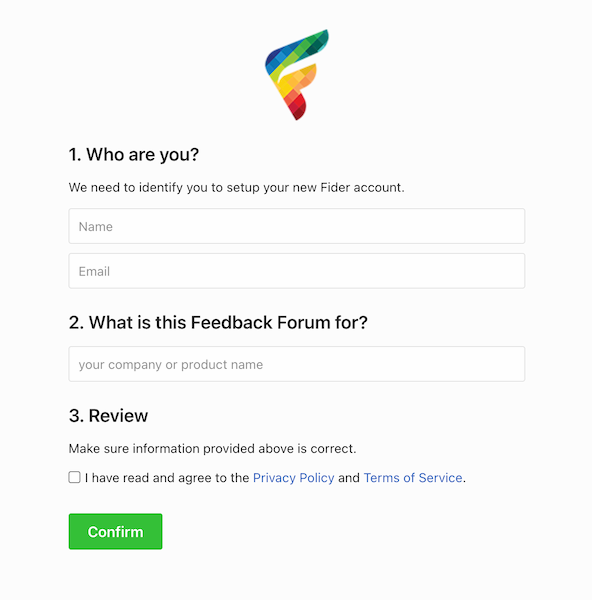
Just open your favorite browser and navigate to http://localhost. You should see a page like the following.
Use a testing SMTP server
You need a valid SMTP server to start the application, or you will see panic: could not find environment variable named 'EMAIL_SMTP_HOST' errors.
If you don't have one and just want to test, you can use MailHog. Add a new service to your docker-composer.yml, and configure it:
  app:
    environment:
      # use this EMAIL config:
      EMAIL_SMTP_HOST: mailhog
      EMAIL_SMTP_PORT: 1025

  # add this service:
  mailhog:
    image: mailhog/mailhog
    restart: always
    ports:
      - "8025:8025"
Then restart docker compose. You can now browse to http://localhost:8025 and read mails sent by fider, especially the sign-in link.
Secure Fider with HTTPS
When exposing Fider to the internet, it's strongly recommended to setup HTTPS. Take a look at How to enable TLS/SSL to learn multiple ways on how to do that.
F.A.Q.
I have submitted the installation form, but I haven't got any confirmation email
Start with your Spam folder, it shouldn't be there, but just be sure about that first. If not, it's highly likely that you either input the wrong email or your email configurations are invalid. When this happens, you'll notice that you can't fill in that form again as you'll be presented with a 404 page. This page will only go away when you click the confirmation link that Fider sends.
To solve this you'll need to log into your Postgres Database and run TRUNCATE TABLE tenants RESTART IDENTITY CASCADE;. This command will purge all the data from Fider, thus making the installation page available again. You may now change your email configurations and try again. You can repeat this as much as you need.